
Dutch Oven No Knead Crusty Bread Recipe
If you have ever dreamed of baking bakery-quality bread at home without breaking a sweat, the Dutch Oven No Knead Crusty Bread is the perfect recipe for you. This delightful bread combines a golden, crusty exterior with a tender, airy interior, all achieved without any kneading or fancy equipment—just simple pantry staples and a trusty Dutch oven. It’s wonderfully forgiving, incredibly satisfying to make, and will fill your kitchen with that irresistible aroma of freshly baked bread, making it a true staple to add to your baking repertoire.
Ingredients You’ll Need
The beauty of this Dutch Oven No Knead Crusty Bread lies in its simplicity. Each ingredient plays an essential role in building its flavor, texture, and beautiful crust. With just four basics, you’ll create something extraordinary.
- Warm water (1 1/2 cups): This activates the yeast and helps form the dough’s perfect sticky consistency.
- Yeast (1 packet / 2.25 teaspoons): Using active dry, instant, or quick rise yeast will get your dough bubbling and rising beautifully.
- Fine grain salt (1 ½ teaspoons): Salt brings out the flavor and balances the overall taste.
- All-purpose flour (3 1/4 cups): The foundation of your loaf, this flour gives structure while ensuring a tender crumb inside.
How to Make Dutch Oven No Knead Crusty Bread
Step 1: Mix the Water, Yeast, and Salt
Start by combining the warm water with yeast and salt. Whisk gently until the yeast and salt dissolve, creating a pleasant foamy base that signals the start of your dough’s journey. This step is crucial for getting everything evenly distributed.
Step 2: Add the Flour
Pour in all the flour at once and stir until a sticky dough forms. No need to overthink it or mix obsessively—aim for uniform wetness. The dough is supposed to be a bit messy and sticky, which is key to the bread’s airy texture. If it feels off—too wet or dry—adjust with a tablespoon of flour or water as needed.
Step 3: Let the Dough Rise
Cover your dough with a kitchen towel or loosely with a lid and place it somewhere warm to rise for 2 to 3 hours. You’re aiming for it to double in size. If your kitchen is chilly, a clever trick is to warm your oven briefly, switch it off, and let the dough rest inside to capture that cozy heat.
Step 4: Preheat Your Dutch Oven
Thirty minutes to an hour before baking, preheat your oven to 450 degrees Fahrenheit and place the Dutch oven inside with its lid on. This preheating step helps create that amazing crust by ensuring the Dutch oven is piping hot when the dough goes in.
Step 5: Shape the Dough and Score the Loaf
Turn the dough onto a piece of parchment paper dusted with flour. Gently fold the edges to create a loose loaf shape, then flip it over so the floured side is on top. You can score the top with a sharp knife—cutting shallow slits helps the bread expand and adds character to the crust.
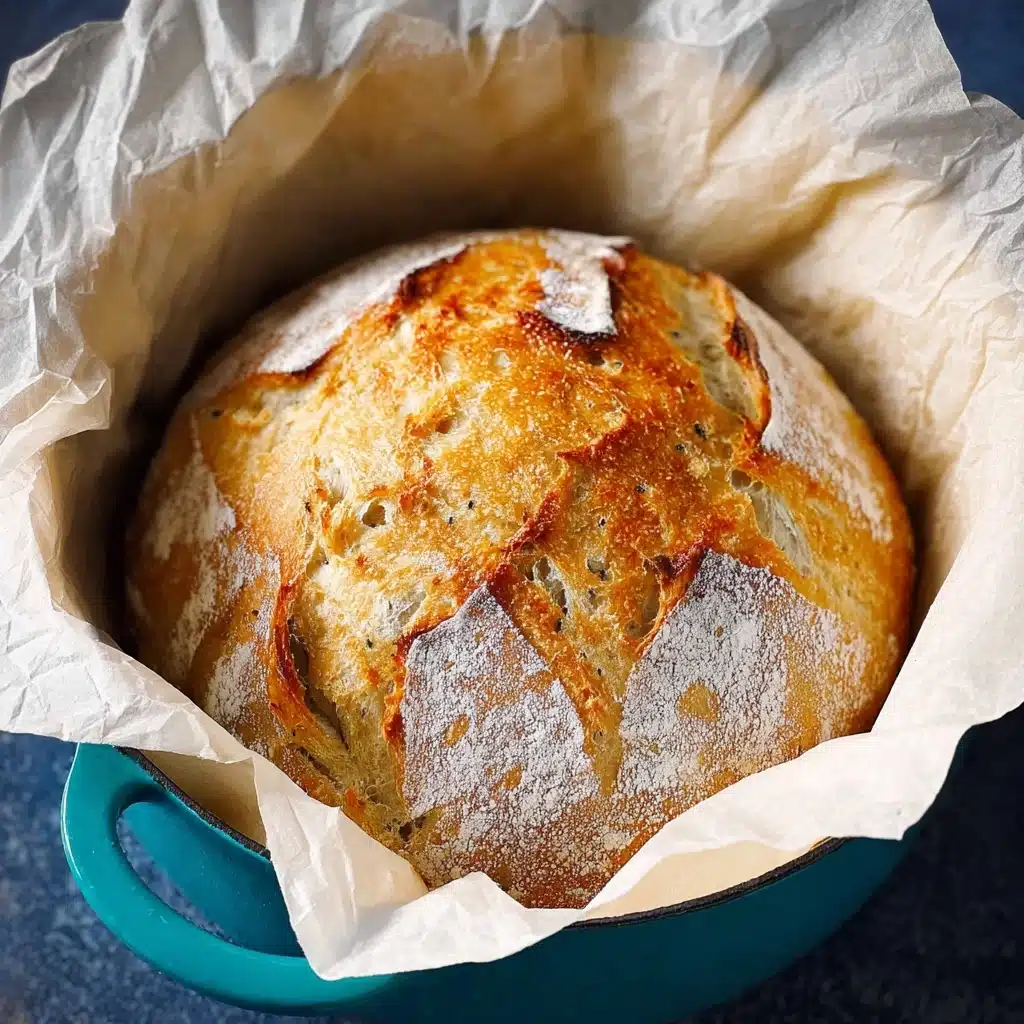
Step 6: Bake the Bread
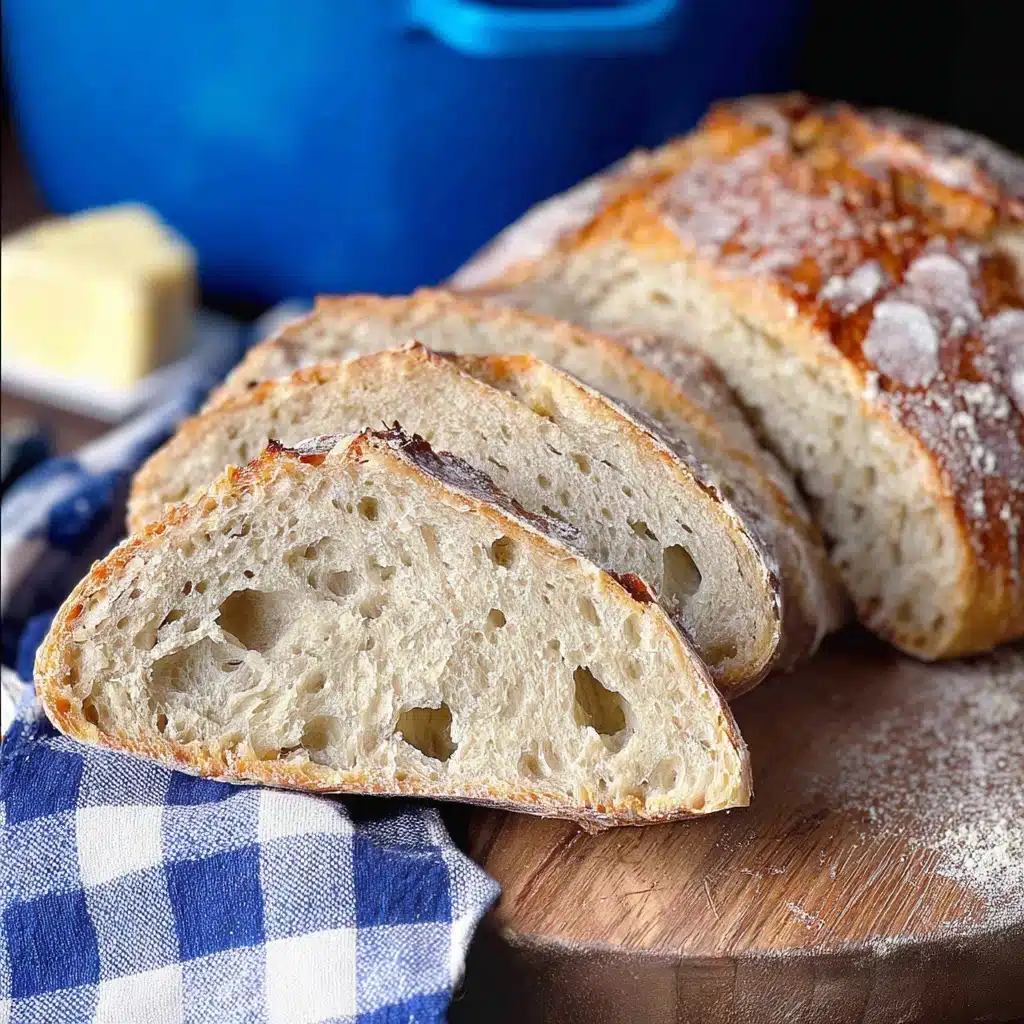
Carefully place the dough inside the hot Dutch oven using the parchment paper. Cover with the lid and bake for 35 minutes at 450 degrees. If the dough was refrigerated before baking, extend the covered baking time to 40 minutes. Remove the lid at the end and bake for an additional 5 to 10 minutes until the crust turns a rich golden brown. Then transfer your loaf to a wire rack to cool, letting the magic finish inside the bread.
How to Serve Dutch Oven No Knead Crusty Bread
Garnishes
While the bread shines on its own, a light brush of olive oil or melting butter right when it’s warm can elevate every bite. Sprinkling fresh herbs like rosemary or a little flaky sea salt on top after baking can also add a lovely touch of flavor and a bit more crunch.
Side Dishes
This crusty bread pairs wonderfully with all sorts of dishes—imagine dipping it into a rich soup, slathering it in creamy cheese, or making hearty sandwiches. It goes perfectly alongside a bowl of tomato basil soup, a warm clam chowder, or atop a fresh salad with tangy vinaigrette. The versatility makes it a breath of fresh air for weeknight dinners or casual brunches.
Creative Ways to Present
For a real showstopper, slice your Dutch Oven No Knead Crusty Bread into thick slabs, toast them lightly, and top with avocados, poached eggs, or even roasted garlic and goat cheese. You can also hollow out the loaf to create a rustic bread bowl for dips or chili—instantly making your presentation impressive and intimate.
Make Ahead and Storage
Storing Leftovers
If you have leftover bread, the best way to keep its freshness is in a paper bag or wrapped loosely in a clean kitchen towel at room temperature. This helps maintain the crust’s crispness while avoiding sogginess. Avoid plastic bags as they trap moisture and make the crust soft.
Freezing
You can freeze the Dutch Oven No Knead Crusty Bread by wrapping it tightly in plastic wrap followed by aluminum foil to prevent freezer burn. When thawed, it retains much of its fresh-baked quality and is perfect for those days when you want homemade bread without the wait.
Reheating
To bring back that fresh-from-the-oven crust, reheat slices or the whole loaf in a hot oven (around 350 degrees Fahrenheit) for 10 to 15 minutes. If reheating slices, placing them on a baking sheet directly in the oven ensures they get beautifully crisp, just like when fresh.
FAQs
Can I use whole wheat flour instead of all-purpose flour?
Absolutely! You can substitute whole wheat flour for up to half of the all-purpose flour. Just be aware that the bread may be denser and have a nuttier flavor. Adding a tablespoon or two of vital wheat gluten can help maintain a nice rise and light crumb.
What if I don’t have a Dutch oven? Can I use another baking vessel?
While a Dutch oven provides the best steam-trapping environment to create that perfect crust, you can use a heavy ceramic or cast iron pot with a lid. Alternatively, bake the loaf on a preheated baking stone or sheet and create steam by adding water to a pan in the oven; it won’t be quite the same, but still delicious.
How long does the dough need to rise?
Typically, the dough should rise 2 to 3 hours at room temperature or until it doubles in size. If your environment is colder, it may take longer. The dough’s look and size are better indicators than exact timing.
Can I refrigerate the dough before baking?
Yes! After the initial rise, you can cover and refrigerate your dough for up to 12 hours. Baking straight from the fridge will require a slightly longer baking time (about 40 minutes covered), and it also develops deeper flavors.
Is this bread suitable for beginners?
Definitely! The Dutch Oven No Knead Crusty Bread recipe is incredibly beginner-friendly since it skips tricky kneading and uses straightforward steps. It’s a fantastic introduction to bread baking and builds confidence with every loaf baked.
Final Thoughts
Baking Dutch Oven No Knead Crusty Bread is one of those joyful kitchen experiences that makes you feel like a pro baker without the fuss. The combination of minimal ingredients, no kneading required, and a perfectly crusty result is truly a win-win. So grab your Dutch oven, gather your ingredients, and enjoy the warm satisfaction of freshly baked bread that will soon become a beloved staple in your home.