
No Knead Artisan Bread Recipe
Introduction
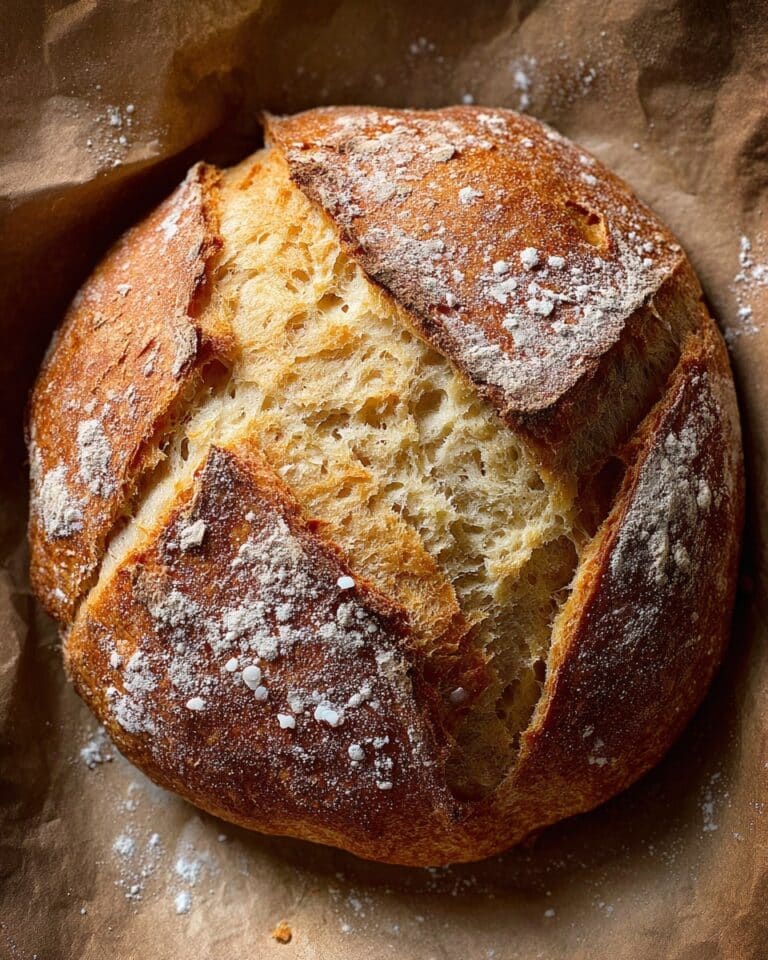
This No Knead Artisan Bread is a simple yet impressive homemade loaf with a crisp crust and soft, airy crumb. With minimal effort and everyday ingredients, you can enjoy fresh, bakery-quality bread at home.
Ingredients
- 3 cups bread flour (or plain/all purpose)
- 1 tablespoon white granulated sugar
- 2 teaspoons dried yeast (instant or rapid rise)
- 1 1/2 teaspoons salt
- 1 1/2 cups warm water
- 1 tablespoon olive oil
Instructions
- Step 1: In a large bowl, combine the flour, sugar, yeast, and salt. Add the warm water and olive oil, stirring until all ingredients are incorporated. The dough will be wet, sticky, and shaggy.
- Step 2: Lightly spray the top of the dough with cooking oil spray. Cover the bowl with plastic wrap, then place a dry tea towel over it.
- Step 3: Leave the dough in a warm, draft-free place for 2 to 3 hours, or until it has doubled in size. The dough should look bubbly and wobble like jelly when moved.
- Step 4: Place a large (10-inch or 26cm) Dutch oven or heavy-based pot with its lid in the oven and preheat to 450°F (230°C) for 30 minutes before baking.
- Step 5: Lightly flour your work surface and a plastic spatula with up to 1 tablespoon of flour. Scrape the dough onto the surface using the spatula. Sprinkle the top of the dough with a generous pinch of flour and fold it over itself 5 to 6 times using the spatula to form a rough round shape.
- Step 6: Cut a large piece of parchment paper to transfer the dough. Place the paper next to the dough and roll the dough onto it, keeping the smooth side up. Center the dough on the paper and reshape if needed.
- Step 7: Loosely cover the dough with plastic wrap and let it rest while the oven finishes preheating.
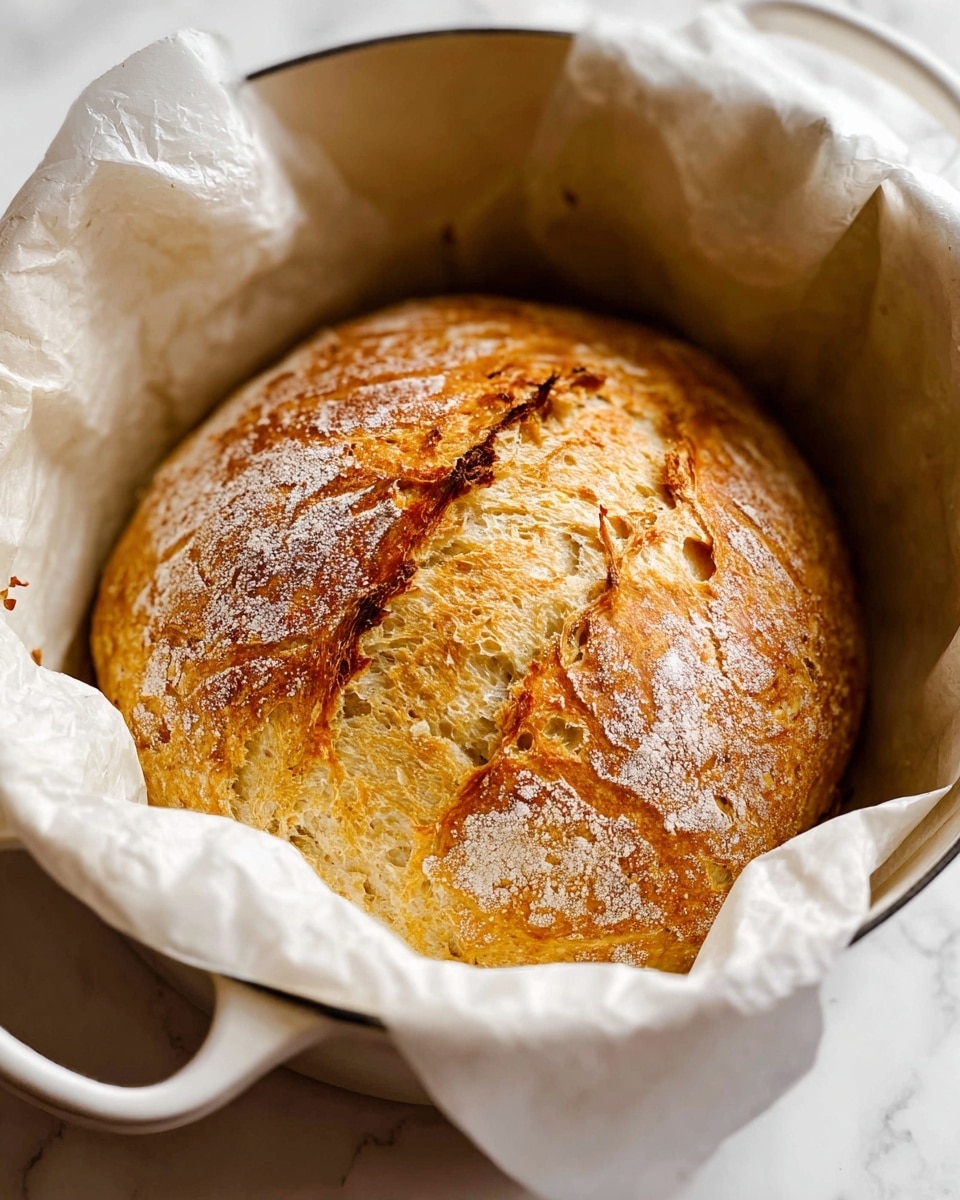
- Step 8: Using oven mitts, carefully remove the hot Dutch oven from the oven. Lift the parchment paper by each end to place the dough into the pot.
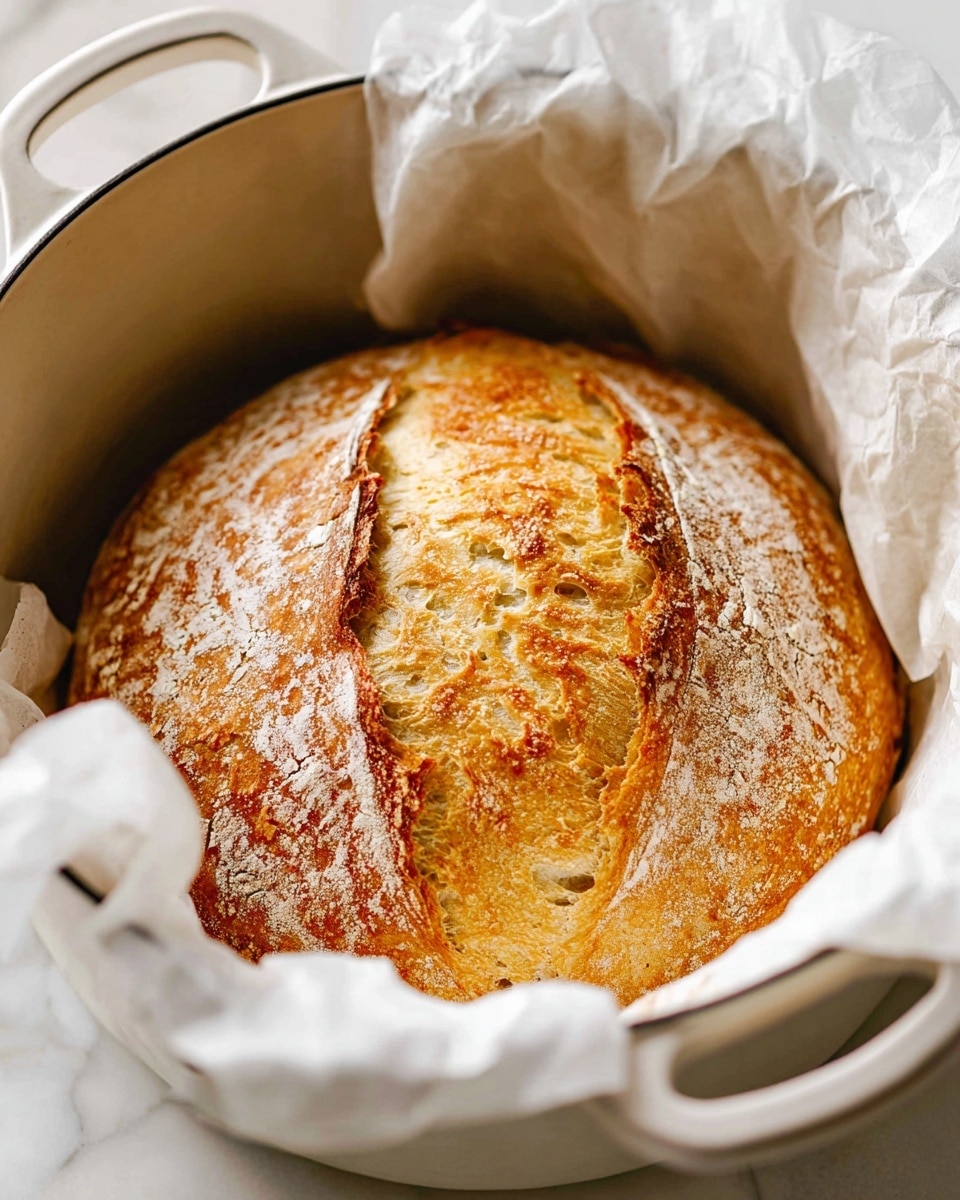
- Step 9: Cover with the lid and bake for 30 minutes. Then, remove the lid and bake for another 12 to 15 minutes, until the loaf is golden brown and crusty.
- Step 10: Transfer the bread to a wire rack and let it cool for 10 minutes before slicing.
Tips & Variations
- For a richer flavor, substitute half the water with warm milk.
- Add herbs like rosemary or thyme to the dough for an herbed twist.
- Make sure the water is warm, not hot, to activate the yeast without killing it.
- Use a cast iron Dutch oven for best heat retention and crust formation.
Storage
Store the bread at room temperature in a paper bag or loosely wrapped in a clean kitchen towel to maintain the crust. It’s best eaten within 2 days. To refresh the crust, warm slices in a toaster or oven before serving.
How to Serve
Serve this delicious recipe with your favorite sides.
FAQs
Can I use all-purpose flour instead of bread flour?
Yes, all-purpose flour works well if you don’t have bread flour. The texture may be slightly less chewy but the bread will still turn out delicious.
Do I need a Dutch oven to bake this bread?
A Dutch oven helps create steam and retain heat for a crispy crust, but you can use any heavy, oven-safe pot with a lid if you don’t have one.
Print
No Knead Artisan Bread Recipe
- Total Time: 2 hours 52 minutes
- Yield: 12 servings 1x
Description
This No Knead Artisan Bread recipe yields a rustic, crusty loaf with minimal effort, perfect for beginners and bread lovers alike. The dough requires no kneading, only a few simple ingredients, and bakes beautifully in a preheated Dutch oven to create an airy, golden-brown crust with a soft, chewy interior.
Ingredients
Dough Ingredients
- 3 cups bread flour (or plain/all purpose)
- 1 tablespoon white granulated sugar
- 2 teaspoons dried yeast (instant or rapid rise)
- 1 1/2 teaspoons salt
- 1 1/2 cups warm water
- 1 tablespoon olive oil
Instructions
- Combine Ingredients: In a large bowl, mix together the flour, sugar, yeast, and salt. Add the warm water and olive oil, stirring gently until all ingredients are fully incorporated. Expect the dough to be wet, sticky, and shaggy in texture.
- Initial Proof: Lightly spray the dough surface with cooking oil spray. Cover the bowl with plastic wrap, then place a dry tea towel over the top to insulate. Leave the dough in a warm, draft-free environment for 2-3 hours until it doubles in size and becomes bubbly and jiggly.
- Preheat the Oven and Dutch Oven: Position a large (10-inch or 26cm) Dutch oven or heavy-based pot with a lid inside your oven. Preheat the oven to 450°F (230°C) and allow the pot to heat for at least 30 minutes before baking.
- Shape the Dough: Lightly flour your work surface and a plastic spatula with about 1 tablespoon of flour. Using the spatula, scrape the dough out onto the surface. Sprinkle a large pinch of flour over the dough and fold it over itself 5-6 times to form a rough round shape.
- Prepare for Baking: Cut a large piece of parchment paper, big enough to hold the shaped dough. Place the dough onto the parchment paper, smooth side up. Adjust the dough so it is centered and evenly distributed; it will even out as it bakes.
- Final Rest: Loosely cover the dough with plastic wrap and allow it to rest while the oven finishes preheating, about 10-15 minutes.
- Transfer to Dutch Oven: Using oven mitts, carefully remove the hot Dutch oven from the oven. Lift the dough by the parchment paper edges and place it inside the pot.
- Bake Covered: Cover the Dutch oven with its lid and bake for 30 minutes at 450°F (230°C).
- Bake Uncovered: Remove the lid carefully and continue baking the loaf for an additional 12-15 minutes until the crust turns a deep golden brown.
- Cool: Remove the bread from the pot and transfer it to a wire rack. Let cool for 10 minutes before slicing and serving to allow the crumb to set properly.
Notes
- Ensure the water is warm, not hot, to activate the yeast properly without killing it.
- Do not skip the resting period in a warm, draft-free area to allow the dough to rise and develop flavor.
- If you do not have a Dutch oven, use any heavy oven-safe pot with a tight-fitting lid to mimic the effect.
- Light dusting of flour before folding helps manage the sticky dough and aids in shaping.
- Letting the bread cool slightly before slicing prevents the crumb from becoming gummy.
- This bread freezes well; slice and freeze for convenient future use.
- Prep Time: 15 minutes
- Cook Time: 45 minutes
- Category: Bread
- Method: Baking
- Cuisine: American
Keywords: No knead bread, artisan bread, homemade bread, easy bread recipe, Dutch oven bread, rustic bread


